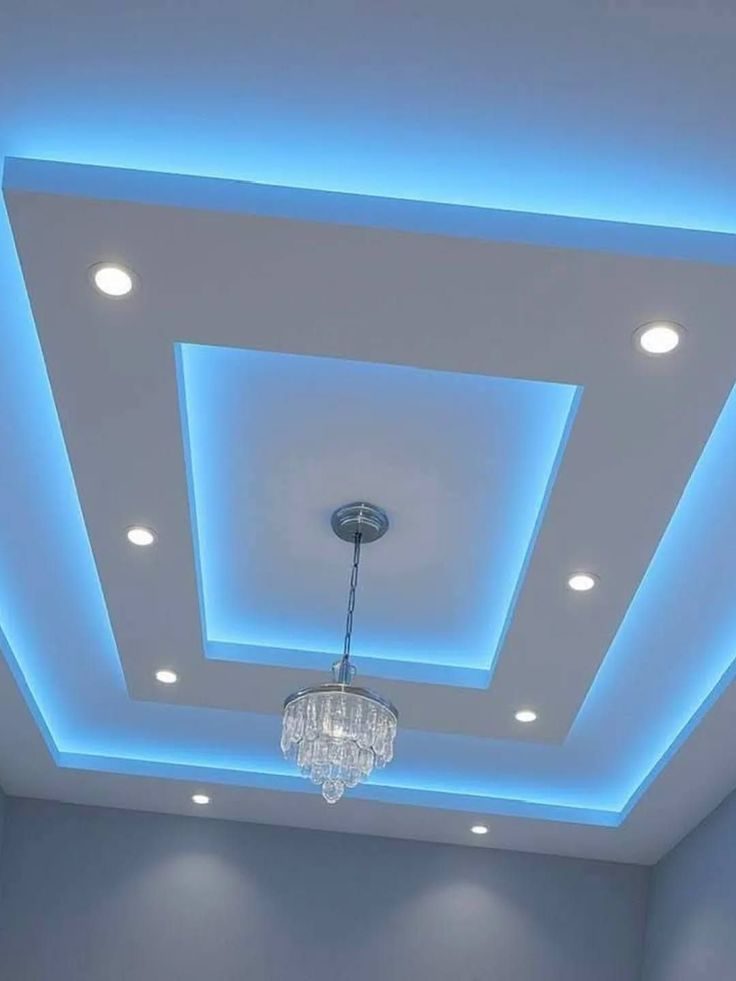
Gypsum Ceiling Installation in Mombasa: What the Process Involves
A complete step by step technical guide to installing a gypsum false ceiling in Mombasa and coastal Kenya. Learn about framing, moisture resistant greenboard, coastal curing times, anti corrosion materials, and common installation pitfalls.

Installing a gypsum false ceiling in Mombasa is a completely different technical task than installing one in Nairobi or Nakuru.
If you browse local property forums, Reddit home improvement threads, or active Kenyan construction groups on Facebook, you will see recurring complaints from coastal homeowners. People frequently report ceilings that started sagging after eight months, brown rust spots bleeding through paint near screw heads, or joint lines cracking along perimeter walls.
In almost every case, these issues are not caused by bad materials. They are caused by fundis using upcountry installation practices in a coastal environment.
Mombasa, Nyali, Bamburi, Diani, and Kilifi present three unique environmental challenges that directly impact gypsum work. High relative humidity prevents wet joint plaster from drying at normal rates. Salty air corrodes thin metal channels rapidly. Thermal expansion under iron sheet roofs puts constant structural stress on ceiling joints.
Understanding the step by step installation process helps you supervise your project, verify that your contractor uses coastal grade specifications, and ensure your ceiling lasts for decades without cracking or sagging.
This guide provides a comprehensive breakdown of how a professional gypsum ceiling installation works in Mombasa, including material selection, step by step execution, curing timelines, and structural diagrams.
Coastal Material Specifications: The Pre-Installation Standard
Before a single metal channel is screwed to your slab or roof joists, your installation team must assemble the correct materials. Using standard materials meant for dry upcountry climates is the primary reason coastal ceilings fail early.
If you are following our ceiling planning series, you may have already read our guides on How Much Does a Gypsum Ceiling Cost in Mombasa?, explored 12 Modern Gypsum Ceiling Designs for Kenyan Homes, and reviewed our comparison of Gypsum vs PVC Ceiling in Kenya.
The table below outlines the material standards required specifically for Mombasa and coastal Kenya.
| Material Component | Standard Inland Spec | Mandatory Coastal Spec (Mombasa & Coast) | Why the Difference Matters |
|---|---|---|---|
| Plasterboard Type | Standard 9mm / 12mm Ivory White Board | Moisture Resistant (MR) Greenboard | Standard board absorbs atmospheric humidity and sags over time |
| Metal Frame Gauge | 0.35mm to 0.40mm Light Channels | 0.50mm to 0.60mm Heavy Galvanized Steel | Salty sea air corrodes thin steel, causing frame collapse |
| Screw Type | Black Oxide Drywall Screws | Zinc Coated or Stainless Steel Screws | Black screws rust in coastal moisture, creating brown wall stains |
| Joint Tape | Standard Paper Tape | Self Adhesive Fiberglass Mesh Tape | Mesh tape allows joint compound to breathe and resist mold |
| Primer Paint | Regular Water Based Undercoat | Alkali Resistant Anti Fungal Sealer | Prevents mold spores and humidity from penetrating the plaster |
The 7 Step Gypsum Ceiling Installation Process in Mombasa
Step 1. Laser Leveling and Perimeter Channel Marking
A straight ceiling relies entirely on accurate level marking. In older Mombasa properties or coastal houses built with coral stone blocks, walls and concrete slabs are rarely perfectly plumb.
The installation team uses a 360 degree self leveling green beam laser to project a crisp horizontal datum line across all four walls.
- Establishing Ceiling Drop. The master installer calculates the finished floor to ceiling height. For a simple flat ceiling, the drop is typically 100mm to 150mm below the lowest point of the concrete slab or timber joist.
- Chalk Line Marking. The laser line is traced with a chalk line tool to provide a permanent guide for wall channels.
- Perimeter Track Fixing. Galvanized wall angle profiles are fixed directly along the chalk line at 400mm intervals using steel masonry nails or expanding wall plugs.
+-----------------------------------------------------------------------+
|                         CONCRETE SLAB / ROOF JOIST                     |
|                                                                       |
|  [Laser Datum Line] = = = = = = = = = = = = = = = = = = = = = = = =   |
|         |                                                   |         |
|   (Wall Angle)                                         (Wall Angle)   |
|         |                                                   |         |
|   +-----+---------------------------------------------------+-----+   |
|   |                   PERIMETER STEEL TRACK FRAME                   |   |
+---+-------------------------------------------------------------------+---+
Step 2. Primary and Secondary Framing Grid Construction
The metal framing grid is the skeleton of your false ceiling. In Mombasa, structural framing must be rigid enough to support board weight without relying on the walls alone.
- Primary Main Channels. Main galvanized steel channels run parallel across the room width at 600mm center-to-center spacing.
- Secondary Cross Studs. Secondary studs snap into or screw directly onto the main channels at right angles, forming a rigid grid matrix.
- Slab Anchoring Suspensions. The framework is suspended from the upper concrete slab using galvanized steel suspension brackets, angle cleats, or threaded rod hangers spaced every 900mm.
- Coral Stone and Slab Wall Anchors. In coastal construction where slabs may contain coral aggregate or marine sand screeds, standard plastic wall plugs can pull free. Installers must use heavy-duty steel expansion anchor bolts (roll bolts) for structural suspension points.
Step 3. Electrical, AC, and Service Conduit Rough-In
Once the metal framing grid is secured and level, electrical and mechanical technicians complete all concealed service work before any plasterboard is attached.
- Lighting Wiring Loops. Electricians pull flame-retardant PVC conduits through the service access holes in the metal studs. Cable tails are left hanging at exact coordinates for spotlights, LED driver transformers, and central pendant lights.
- Air Conditioning Drainage and Refrigerant Lines. In Mombasa homes where split-system air conditioners are essential, drain pipes and copper refrigerant lines passing through the ceiling space are fully insulated to prevent condensation dripping onto the boards.
- Structural Backing for Heavy Fixtures. Heavy items like ceiling fans, large chandeliers, or heavy glass pendants cannot be screwed into 9mm gypsum board. Technicians install timber block supports or additional steel channel reinforcements directly into the frame above designated fixture locations.
               +-----------------------------------------+
               |          CONCRETE SLAB ABOVE            |
               +-----------------------------------------+
                 |             |             |
           [Steel Hanger] [Steel Hanger] [Steel Hanger]
                 |             |             |
  ===============+=============+=============+==============  <-- Main Steel Runner
         ||             ||             ||             ||
  -------++-------------++-------------++-------------++-------  <-- Cross Stud (600mm Grid)
         ||             ||             ||             ||
         ||        [Timber Anchor]     ||             ||        <-- Structural Fan Anchor
         ||        (For Chandelier)    ||             ||
  =======\/=============\/=============\/=============\/=======  <-- 9mm MR Greenboard
Step 4. Plasterboard Installation and Screw Fastening
Board installation requires careful handling to keep edges crisp and joints tight.
- Board Selection. Installers use 9mm or 12mm Moisture-Resistant Greenboard across all coastal interior spaces.
- Staggered Layout Pattern. Boards are fixed in a running bond (brickwork) pattern so four board corners never meet at a single point. Staggering joints distributes structural tension and prevents long continuous cracks from forming across the room.
- Screw Spacing and Depth Control. Zinc-coated drywall screws are driven at 150mm intervals along board edges and 200mm intervals across internal field studs. Screws must be driven slightly below the paper surface using a dimbler drill bit without tearing through the green paper facing.
- Shadowline Edge Provision. Along perimeter walls, professional installers leave a 10mm shadowline gap using an aluminum shadowline profile instead of jamming boards tightly against uneven screeded walls. This gap accommodates natural building expansion during hot Mombasa seasons.
Step 5. Joint Taping, Filling, and Coastal Curing Management
This is where upcountry installation methods often fail at the coast. In Nairobi, joint filler dries rapidly within two to three hours. In humid Mombasa, high atmospheric moisture slows down the evaporation of water from jointing compounds.
- Fiberglass Mesh Taping. Self-adhesive alkali-resistant fiberglass mesh tape is applied directly over all board seams, internal corners, and perimeter transitions.
- First Coat Application. A high-strength joint compound (such as Gyproc Joint Filler) is troweled firmly through the mesh tape, filling the recessed board edges completely.
- Curing Interval. In coastal humidity, installers must wait at least 12 to 18 hours for the first coat to cure completely before applying subsequent layers. Rushing this step traps moisture inside the joint, causing joint swelling, yellow discoloration, and tape peeling months later.
- Second and Feathering Coats. A second wider coat is applied using a 10-inch or 12-inch jointing knife, feathering the edges outward by 150mm on either side of the joint to create an invisible transition. Screw dimples are skimmed simultaneously.
Step 6. Full Surface Skimming and Precision Sanding
For a smooth luxury finish, simple spot-jointing is rarely enough. A full skim coat ensures the board surface absorbs paint evenly.
- Full Skim Application. A ultra-fine finishing plaster or ready-mixed skimming compound is troweled across the entire ceiling plane in a thin, continuous 1mm to 2mm coat.
- Drying Observation. The skimmed ceiling is left to dry naturally. Artificial heat fans should not be used, as forced rapid drying can cause hairline shrinkage cracks in humid air.
- Side-Light Inspection and Sanding. Once dry, installers use a high-lumen LED work light held parallel to the ceiling surface (side-lighting). This highlights tiny ridges, scratches, or uneven dips. Technicians sand these areas smooth using fine P150 to P220 grit sandpaper fitted to a pole sander.
Step 7. Anti-Fungal Priming and Acrylic Painting
The final step seals the gypsum plaster against coastal air and moisture.
- Dust Removal. The sanded ceiling is thoroughly dusted using a dry microfiber cloth or soft brush vacuum attachment to remove fine plaster dust.
- Alkali-Resistant Primer. Two coats of an alkali-resistant, anti-fungal primer are applied. This seals the porous joint compound and board facing paper, preventing moisture absorption.
- Final Topcoats. Apply two to three coats of high-grade, washable matte acrylic ceiling paint. Premium matte paint hides light reflections and gives the ceiling a smooth, velvet-like appearance.
Technical Curing & Timeline Comparison
Because relative humidity in Mombasa averages between 70% and 85%, installation timelines are longer than inland projects.
The table below provides a realistic time comparison for completing a standard $30\text{m}^2$ living room ceiling.
| Project Stage | Inland Kenya (Nairobi / Nakuru) | Coastal Kenya (Mombasa / Kilifi) | Key Coastal Adjustment Factor |
|---|---|---|---|
| Stage 1. Framing & Conduit Rough-In | 1 Day | 1 Day | No change; structural steel assembly is identical |
| Stage 2. Board Fixing & Shadowlines | 1 Day | 1 Day | Ensure zinc-coated screws are used throughout |
| Stage 3. Joint Taping & 1st Fill | 0.5 Day | 0.5 Day | Requires high-strength joint compound |
| Stage 4. 1st Coat Drying Window | 3 to 5 Hours | 12 to 18 Hours | Must allow overnight drying due to humidity |
| Stage 5. 2nd Fill & Full Skim | 1 Day | 1 Day | Feather joint edges wider for smooth transitions |
| Stage 6. Skim Drying Window | 6 to 8 Hours | 18 to 24 Hours | Allow full 24-hour cure before sanding |
| Stage 7. Sanding, Priming & Paint | 1 Day | 1.5 Days | Anti-fungal sealer requires thorough drying between coats |
| Total Project Duration | 3 to 4 Days | 5 to 6 Days | Do not allow contractors to rush curing windows |
5 Critical Installation Mistakes to Avoid in Mombasa
- Using Light 0.35mm Steel Profiles. Thin metal channels cannot handle coastal conditions. They corrode quickly when exposed to salt air and flex under heavy greenboard weight, leading to ceiling sag within a year. Always insist on 0.50mm+ heavy galvanized channels.
- Skipping Moisture-Resistant Greenboard. Installing regular white gypsum board in Mombasa living rooms or bedrooms to save costs is a mistake. High humidity causes standard paper-faced boards to absorb moisture, leading to mold growth and surface softness.
- Rushing Plaster Drying Windows. Installers who attempt to tape, skim, sand, and paint a coastal ceiling within 48 hours trap moisture behind the paint film. This leads to blistering paint, brown water rings, and peeling joint tape.
- Omitting Timber Backing for Ceiling Fans. Fixing a heavy ceiling fan or large chandelier directly into 9mm plasterboard using plastic toggle anchors is unsafe. Vibration will enlarge screw holes over time, causing the fixture to wobble or fall.
- Using Non-Galvanized Screws and Nails. Standard black iron screws rust rapidly in coastal air. Within six months, rust bleeds through plaster and paint, creating unsightly brown spots across your white ceiling. Always verify your installer uses zinc-coated or stainless steel fasteners.
Frequently Asked Questions
How long does a gypsum ceiling installation take in Mombasa?
For a standard single room ($20\text{m}^2$ to $35\text{m}^2$), a proper coastal installation takes between 5 and 6 working days from initial framing to final paint topcoat. This timeline accounts for necessary curing intervals between jointing coats in high humidity.
Why do some gypsum ceilings in Nyali develop yellow stains or sagging?
Yellow stains and sagging are almost always caused by using standard white plasterboard instead of Moisture-Resistant Greenboard, or by painting over joint compound before it has fully dried. In some cases, slow roof leaks or air conditioning pipe condensation dripping onto the upper side of the board cause similar staining.
Can you install a gypsum ceiling under a corrugated iron sheet (mabati) roof in Mombasa?
Yes, but you must include thermal insulation. Iron sheet roofs in Mombasa reach extreme temperatures during the day. Installing a gypsum ceiling directly beneath mabati without glasswool or reflective foil insulation traps heat in the ceiling cavity. This heat can cause joint compound to expand and crack while making the room below uncomfortable.
What is the best paint finish for coastal gypsum ceilings?
Use a high-quality matte acrylic ceiling paint formulated with anti-fungal additives over an alkali-resistant primer. Matte finishes absorb light evenly, hiding small joint seams and providing a clean appearance. Avoid high-gloss or silk paints on flat ceiling surfaces, as they highlight minor board imperfections under light.
Professional Coastal Ceiling Installations by BenPhil Interiors
A long-lasting gypsum ceiling in Mombasa relies on correct material specifications, anti-corrosion structural framing, and proper curing time management.
At BenPhil Interiors, our master installation teams specialize in coastal ceiling solutions across Mombasa, Nyali, Bamburi, Shanzu, Mtwapa, Diani, and Kilifi. We use heavy-gauge galvanized framing, moisture-resistant greenboard, anti-rust zinc fasteners, and anti-fungal sealers on every project to guarantee clean lines and long-term durability.
Planning a Ceiling Installation or Renovation at the Coast?
Contact our technical team today to arrange a free site visit, structural evaluation, and itemized quotation.
📲 Click Here to WhatsApp BenPhil Master Craftsmen
📞 Call Us Directly: +254 107451486
📍 Service Coverage: Mombasa, Nyali, Bamburi, Shanzu, Mtwapa, Diani, Kilifi, Watamu, Malindi & nationwide across Kenya.
Have a project in mind?
Get a free consultation and rough quote within hours.
.jpg)
.png)